
My riding background is in downhill and BMX riding. I moved to Samöens in the French Alps when I was 19, around 15 years ago. I bought a Specialized FSR, some kind of 120mm travel 'trail' bike in anticipation of golden singletrack rumoured to be found in that valley rather than pure DH runs I was accustomed to. A few weeks later I had descended one of the steepest and most brutal hiking tracks I had ever seen on the aforementioned trail bike: I was still terrified when I got home and was tucking in to tea and cake in the safety of the apartment. I had questions, a lot of questions: if this was 'trail riding' on 'singletrack,' supposedly some of the best in the world, why did this bike petrify me whilst my downhill bike at the time made me feel like a hero that could huck into anything?
My housemate Nick, and I, spent the post-ride mental recovery time at the table drinking tea looking at the bikes – which were all stored in the living room of course – and talking about them: surely the perfect bike for us would be the downhill bike, but with the saddle in a position we could use to pedal up and lower using a quick release (we had no idea what a dropper was then or if they even existed), and a wide range cassette, which in those days was probably an 11-32t, 9-speed setup.
Fast forward fifteen years to now, and I have that bike we discussed that day. It's continuously evolving and keeps getting better than I ever could have imagined back then. I believe I have built the ultimate mountain bike: I have done 110km rides around Birmingham's canals during lockdown in the UK, raced enduro on it and also downhill. If anything, I believe this is the enduro bike of the future: we all hear the pro's say that the EWS tracks are harder than DH race tracks. Add to this they are also raced semi-blind with only one sighting run so the chances of charging over a crest and hitting the wrong rock are very high. Another addition is the fatigue factor which only increases the chances of a mistake, giving yourself maximum stability and travel increases the chance of a good race.
I have no idea why people aren't racing something like this today, but things are moving in that direction, though, slowly, as brands want to keep their sponsored riders 'on category' or some other marketing term that is usually detrimental to going as fast as possible down a race track. If we look back at how enduro race bikes have evolved over the last seven years since EWS started pushing the boundaries, we only need a couple more degrees and millimetres of travel to get to this point, which means 2-3 years more of evolution at the current rate.
Specification:

Every single part of this bike has been chosen for a specific reason, and I have tuned, tweaked and tested as best as I can in my limited workshop with a limited budget. It's long, slack, heavy, overbuilt, over suspension-ed and not fashionable in any way. But it does everything, can be tuned for any situation and I cannot ride anywhere near its limits.

What. A. Frame. Nicolai and GeoMetron (UK distributor) have sold over 1000x G1 frames and haven’t received a single warranty case, bear that in mind before you head to the comments to complain about the 3.6kg frame weight! The G1 frame was designed for mountain biking not sitting on scales, and so uses a DH spec downtube and is warrantied for use with dual crown forks. The Fac-Raw finish is great, as you can abuse it, then give it a scrub with a brillo pad and it looks like new. Oxidising? Using high-grade 7020 alloy means the frame doesn't go cloudy like softer 6-series alloys and won't corrode like untreated 7075 which has a high quantity of copper in it.
I could choose different anodized finishes or any paint colour I want, but I can’t handle the stress of protecting a nice paint job. I like mountain biking in dirt and rocks and I want to throw it in the back of a van and not worry about paint chips or scratches.

The geometry is as extreme as it gets. I have spent years fighting with bike setup. You can get a good setup with smaller bikes and more 'old fashioned' geometry, but I find if it is not perfect or you are not on-form it can be very hard to ride. When it's long, slack, and with a steep seat angle I have a good day every day I ride and my hips and lower back thank me for the upright seated position. No more battling with setup, I can completely mess with this bike's settings and it still rides comfortably and safely. An important point that I find nearly impossible to get across to people is how important it is to be comfortable: lots of people want a bike that has quick-handling, ‘poppy’ ‘playful’ or whatever adjectives they come up with. However, if your bike feels nimble in the car park, when you're holding on for dear life in a rough, wet, off-camber, trying to slow down and set up wide for a corner (unless you’re Nicolas Vouilloz) there’s a chance you won’t have enough control and brain capacity to hit the mark you want, especially if you're hanging off the back of the bike fighting a steep head angle and a super short chainstay making front/rear balance very difficult. Meanwhile, if the bike feels lazy and slow in the car park then you’ll be able to concentrate on your line and riding on the trail. The biggest fallacy about the GeoMetron geometry is that it is for expert-level riders only, I believe that could not be further from the truth - it’s for everyone and beginners get the most advantage from it in terms of safe and easy handling.


The G1 uses 'Mutators' so I can manipulate the frame in many different ways. The mainframe pieces (mainframe, chainstay, seatstay and rocker link) are all the same regardless of the setup you choose: 27.5", 29", or hybrid, you can probably run 26"/29" if you like. This frame is straight off-the-shelf with no modifications, I added the longer 250x75mm shock and tried a couple of different seatstay Mutators until the bike's shape was in the right ballpark. These are also really useful if you are changing riding areas: for example, I live in Finale, but often go to bike parks in the Alps like the Portes du Soleil. Finale is generally mellower than the Alps, so once I have a good setup here I don’t want to change my suspension settings - I know I can switch a Mutator to lower the bike and change my balance for the steeper stuff. Then, when I come back home I change back to the original chip and my settings return to what I'm accustomed to.
With the chainstay Mutator I always run the longest. The CS is 456mm, we have a prototype that should arrive any day now that is longer. This will give us six options from roughly 446-472mm. Using short chainstays for quick cornering is rubbish in my mind, a balanced bike will corner better on any type of corner than an elongated front and short rear, but it sounds nice in the brochure if you claim short CS are great for all frame sizes, even if the difference between some brands S and XXL front centres can be as much as 150mm. I have ridden eMTB's with 495mm chainstays and went round the tightest corners here easier than when riding a bike that is too small.
Bottom bracket height: The BB is currently about 375mm. Blasphemy! I'm not a super fan of low bottom brackets, especially in Finale where there are plenty of things to catch a pedal on. My theory is that low bottom brackets were great to improve stability on tiny bikes with small wheels a few years ago, nowadays we mostly use bigger wheels so we instantly have higher axles and more BB drop, plus this bike is so inherently stable that a higher BB lets me ride through rocks and ruts with much more confidence.

I find it also switches direction easily with my style of riding: I pump the bike a lot and unweight it between corners, at full extension I am standing above the axles and so it tips over easily. This also keeps the bike leaned over in turns better: if you are standing far below the axles your weight pushing through the BB is trying to stand the bike up.


The rest of the frame is simple, solid, and overbuilt just how I like it. Nicolai has been making evolutions of this frame for more than 15 years so every minutia has been perfected. There are no threads in the frame (except BB and some cable mounts) so if you damage a thread in a pivot, brake mount, or ISCG tab, you can replace the piece and keep using your frame.
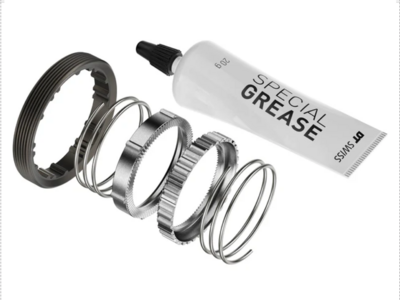
All the cartridge bearings in the pivots use standard o-rings fitted inside the frame on either side to prevent water and dirt ingress. A few weeks ago I stripped the frame completely and there was still plenty of clean, blue grease inside from the factory, after 11 months of use, and only two bearings were feeling slightly rough. I have now removed all the o-rings as they do create a little bit of friction which I wanted to remove, I wouldn't sacrifice the extra seals if I didn't live in an extremely dry climate, but I like to think I have gained a tiny bit more traction here.
The cable routing on this bike is perfect: fully external, and brakes and gear housing can be removed completely without even taking the wheel out, my record for a brake change is 4.20s.
Lately, we have these new clips that route housing through the centre of the main pivot which leads to less movement as the hose folds around the pivot point. I also like the way that all the fasteners can be reused instead of wasting cable ties.
Fork: Manitou Dorado RRT, 210mm travel

RRT stands for Rulezman Race Tune, I like to call it the DorGnardo. Rulezman is a suspension centre in Liguria. 'Crazy Dave' the owner pisses a lot of people off by telling them the truth about the products they just spent a fortune on, he's focussed only on performance and measures everything. He's a helicopter pilot, and can strip and rebuild a Cane Creek DB shock blindfolded; that should give you more idea of the kind of guy he is. Anyway, he loves the Dorado and believes it is the best fork on the market and has taken this fork to the extreme: extended 210mm travel, fully customized and modified damper and IRT triple air spring, every single sliding surface and seal has been worked on, ti-bolts everywhere and even the bushings have been reworked for less stiction on fore-aft movements - the legs must be set so the Rulezman sticker is exactly on the outside for the lowest friction. Dave thinks this is the closest thing to a factory supercross fork in the mountain bike world and would cost around €3000 if he were to sell them.


My favourite thing about this fork is that even though it's years old, it has lots of technologies that other brands are only just becoming the norm: 'Trailside Relief' buttons to bleed air, triple chamber air spring, and floating/MX style axle. It also has hydraulic bottom-out damping, which works in the last 50mm of travel, which matches the shock: the custom Storia's HBC acts on approx the last 31mm of travel.
People worry a lot about torsional flex on USD forks but the first time you hit a big square edge it flows through it with less of a stiction spike as the fork bends backwards less than you are used to, the worry of flex is replaced by a smile as you feel like you can ride into anything. This fork feels better than anything else I have ever ridden in most situations: it's stiffer under braking, it tracks incredibly across rooty off-camber and has guided me safely through situations that had hospitals flashing through my eyes. I have never had a fork setup so firm with compression damping and had so little arm pump, which can only be a good thing too.
The massive top crowns and upper legs give an insane amount of stiffness around the stem and headtube area of the bike, I think this is much more important than having stiff lowers and a flexy steerer tube - now when I go back to a single crown fork I feel like I struggle to steer the bike where I want it as the handlebar/stem flex a lot on top of a single crown steerer. This is especially noticeable of very short and tight corners with good support, you can load the front and steer exactly where you want, the wheel will load, grip, then fire you out the corner.
The downsides: it will feel vague compared to a traditional fork on fast berms and long flat corners, but on those long flat corners it is much calmer or quieter when hitting small bumps, especially little rocks or roots that can make the wheel skip out and make you tense up. It's not very user friendly as the lower legs go all over the place when you want to put the wheel in, and the cable routing is a faff if you can't find a suitable bit of plastic tube to keep it straight despite visiting more than 10x hardware stores. The worst part? people will come and tell you all the time that it's too flexy then put the wheel between their legs and twist the bars to prove it...
A dual crown on an enduro bike? Why not? Unless you can barspin or x-up then there is no problem. I can only recall two times that I ever hit the bump stops in a corner with dual crowns - and at that point this frame/fork connection was the least of my problems.
Rear Suspension and Kinematics

The Storia is a fantastic low-pressure, single-tube shock and this version was designed in conjunction with the G1 frame, it has spherical bearings and coil negative spring upgrades over the standard Storia. The spherical bearings make a noticeable difference when leant over in the rough, on off-cambers and under big compressions, when the bike is twisting and compressing in all directions. Adding spherical bearings won't automatically improve your suspension, though, if you have a bike design like a Trek Session, for example, as there is less side load on the shock, and due to the pivot locations and open angle of the rear triangle keeping the back end of the bike very stiff. The G1 frame shape allows great torsional flex at the rear wheel: the shock, rocker, and seatstay are aligned, but the short chainstay tube and angular contact bearings keep the frame stiff laterally - all these factors together mean this bike tracks like something else.
The coil negative spring inside the main shock body helps with the initial touch of the wheel striking a bump as it overcomes any stiction as the wheel starts to move into the travel. It has about 10mm of negative sag under the weight of the bike. It also has hydraulic bottom-out control that acts on the last 31mm of wheel travel - I have never felt either end of this bike bottom out.
The length is custom at 250x75mm (EXT makes DH shocks in this length but not this enduro version with the Lok lever) and gives 210mm travel. The original tune on this shock was pretty spot-on, but after a solid winter of riding and building confidence and speed, I ended up with all the adjusters closed to get the support I wanted. I added an O-Chain in February which meant it was lacking support due to the reduced anti-squat holding the bike up in the travel. I took the shock to Mojo Risin in Monmouth for a stiffer tune. This was great for a few months but this bike keeps giving me more confidence to go faster, and now I am back to fully closed on the dials - time for an even firmer tune!


Why so much travel? Essentially, the travel itself doesn't weigh anything, so I think it's better to have more even if you rarely use it - you will be glad of it one day. More travel means more sag, and more sag means more grip as the wheels can stay in contact with the ground for longer on bigger bumps or deeper holes, and grip is what you need to go fast on gnarly tracks. As I said earlier, enduro racing is as gnarly as downhill and usually, you're more tired and less knowledgeable of the incoming track, so why not use a DH amount of travel?
My favourite part of using more travel is the consistency: there is more travel to go through smoothly before hitting the end of the travel or an air-spring ramp up. With shorter travel bikes I find that running enough compression damping for a stable bike and enough spring rate or ramp up to prevent bottoming means a harsh ride. Using more travel to absorb the terrain, and then more damping for stability, response, and efficient pedalling works exceptionally well.
Handlebar, Stem, and Steering

I have been using the SQ Lab bars for a couple of years now. This 30X bar has 45mm rise, 12º backsweep, and is 780mm wide (790mm with grips). I use this because the extra backsweep is more comfortable and in one week cured some tendonitis that was building up in my arms for a few years. I usually use the 16º version, but I damaged the end of one in a crash and didn't have another with me on this trip. Luckily, the 5mm adjustment on the stem meant I could get the same steering characteristics by moving it from 30mm to 25mm.
These bars do not have a lot of upsweep at 4º, but because of the extra backsweep compared to the average bar, there is some leeway to roll the bar forwards and get more upsweep whilst maintaining a decent amount of backsweep. I think that many riders roll their bars back for comfort (and better steering), then struggle with ‘chicken wings’ or collapsing elbows and blame it on too much backsweep, I believe lack of upsweep is generally the problem. It’s easy to check: put your hands out in front of you in a riding position, raise the outside edge of your hands upwards and watch your elbows rise and flare out.
I think that most MTB bars will have more backsweep soon: if we look towards MX, BMX and Quad bikes, they all have bars with 10º or more backsweep. I think this is another instance in MTB where companies don’t comprehensively test or try different things, they just follow the norm that evolved from road riding: when handlebars were much narrower they needed to be straighter, but they have grown wider, with the other geometry remaining the same. Again, this can be demonstrated easily: put your hands in front of you in a riding position but close together, then widen your arms to represent the bar getting wider you can see the angle of wrists changing. If you try to keep them in a straight line, the pressure will increase on the inside of your wrist/scaphoid area and pull at tendons under the elbow. You can see a lot of people (often younger, shorter, or female riders) who have a bar that is so wide their forearms are at an angle to their wrists, ideally they should be in line with your arms and perpendicular to the bar. You can also quickly check what bar width you should have by multiplying your height by 4.40, or 4.47 for women (reference LeeLikesBikes). Ideally, I should use 810mm, but I find going over 800mm causes too many problems with narrow trees.
These bars are mounted on a Spank direct mount stem with adjustable 25mm or 30mm length. I chose this stem as it is one of the few DM options shorter than 50mm. It also has a nice wide 31.8mm clamp area, is top-loading which puts less stress on the bolts and I bought it off my mate for €20, which was nice.

The main reason for the shorter stem, combined with the bar shape is to place the steering axis directly through the centre of the steerer (this can be checked by running a string or straight edge from the centre of each grip over the steerer tube). This gives the most accurate and sensitive steering possible as one hand moves forward as the other moves back, instead of arcing from side to side, which can affect balance. Setting the bar in this way speeds up the steering sensitivity, so works best in conjunction with a slack head angle (it can feel twitchy if the HA is too steep). Anybody who says a bike with such a slack head angle will be sluggish has not ridden this setup, and I find slow or sluggish steering is a result of a too-long stem and too-short chainstay.
Grips

Grip choice of the moment is the '711 Tech and Trail' from SQ Lab. They are left and right-sided, come in three sizes, and are shaped with a larger flatter surface on the outside to help distribute pressure on the palm, the underside of the grip is shaped to increase surface area for your fingers to grip around - our hands are not perfectly round so why should grips be?
The 711 acts like a push-on grip with no plastic sheath inside. Again, looking at other sports like MX and BMX, lock-on grips are avoided to reduce the amount of vibration through the bar. I think MTB companies like them as they are easier to fit for mass production bikes, are a lot more expensive, and they can be made in various pretty colours. I find it strange that in a world where brands are spending huge sums of money optimising carbon layups in frames for comfort, reducing friction and vibration in suspension, shaping handlebars to absorb the trail chatter, that most riders use a grip where half of its absorptive depth is replaced with a plastic sheath. The only logical reason I can see to use a lock-on grip is the ease of installation.
These 711 grips do have a lock-on collar for safety, but they fit very tightly. I use grip glue around the collar and at the end of the grip to seal them from water ingress. I also drop a €0.20 coin inside the ends to protect them from the ground in the event of a crash or laying the bike down. SQ Lab are also very specific on not using harmful chemicals in their rubber compounds including: PAH - Polycyclic Aromatic Hydrocarbons, Phthalates + Propylheptyphtalates, Nonylphenol, Cadmium, Mercury, Short-chain Chlorinated Paraffins, Flame retardant PBB (polybrominated biphenyls) / PBDE (polybrominated diphenyl ethers), Bisphenol A (BPA), Azo dye, Pentachlorophenol (PCP), Chromium (VI), and are latex-free, I don't know what most of those are but none of them sound very nice!
Brakes

I'm currently running a Hope E4 up front with a standard 203mm rotor. For the rear brake I chose the V4 caliper with a vented rotor for heat management which is needed for a serial-brake-dragger like me. I'll probably go back to a pair of vented rotors for several reasons: they stay straight for much longer than a standard flat steel disc and I hate when the rotors warp and rub the brake pads (which is every other steep run on many flat steel rotors), they offer better wet-weather performance as water is pushed through each braking surface and out the centre of the rotor: opposing brake pads contacting a normal disc push water against each other and blocks it in the holes, finally, and having two braking surfaces means double the wear time before they need replacing. Downside: even one at cost price they are more than a pair of traditional discs.


I choose the braided hoses every time for their durability, I think that plastic hoses have no place on a mountain bike. The number of times I have seen kinked plastic hoses or cut hoses is silly. Last year we saw a guy on the trail in Finale wondering why his brake was not working, then we spotted that a rock had flung up and cut straight through the hose under the downtube. The only thing I can think of worse than a brake failure is a headtube snapping off and cheap plastic hoses on MTB’s don't make sense to me. Ironically, I did break one of these last year by hitting a tree and snapping it off at the lever junction, but this was a deceleration from about 20kph to zero in a few centimetres.
I always choose the sintered pads for better heat management on long runs in Finale and steeps in the Alps, they also last for ages and are thicker than most pads. E.g, SRAM Code pads have 3.5mm of usable material (pair) before the metal backplate, whereas these Hope pads have 5mm. That’s a big difference economically, especially when most MTB brake pads are more than €30 a pair in Alpine shops.
I also chose the Hope brakes as they are really easy to maintain and individual spare parts are available for all the products they have ever made. They are expensive, but you could buy one pair and use them for life. They are still made in the UK by a great company that doesn’t borrow from banks, provides all its staff with FREE bikes of their choice, and chooses bolts that are a sensible size, instead of trying to save milligrams by using a 2mm hex key somewhere important.

Finally, I use the i-spec adaptors to mount the shifter and dropper lever to the brake levers, as I don't like having more than one clamp on each side of the bar if I can help it.
Seatpost

I would prefer to run a longer dropper, but ‘Sacki’ from BikeYoke is a good friend and provides me with posts. I like his style: he won’t go longer than 185mm drop in a 30.9mm diameter as he cannot guarantee durability. I like it when people do the right thing instead of bashing out products to hit market demand. I have been using these for years now and do not recall a single problem and I can see why they come out on top of so many dropper post group tests. The Revive version was pretty special as it could be ‘revived’ (to bleed out any air) in a few seconds with a hex key if it developed any play, but this Divine version is slightly cheaper and self-revives. Sacki says it’s not quite as smooth as the Revive but I can barely tell the difference. [Edit: Recently BikeYoke launched the Revive 2.0 with up to 213mm drop.]
Saddle

There are many things on bikes which can be adapted to the rider, but one of the most overlooked is the saddle. They are very important for comfort and the direct connection with your body means that they are probably the most important thing to get fitted correctly. I have 10cm wide sit bones, and SQLab recommend adding 4cm for an upright riding position. This is because as your sit bone contact gets narrower as you lean forwards into a more aggressive pedalling position. I normally run the 14cm which is the correct size but choose a slightly narrower 13cm one for bike-parking in the summer for better clearance between my thighs.
I also remove the elastomers (they are supplied with three different compounds), but I am quite light and prefer the added lateral flex for pedalling comfort.
Yes, it is pointed downwards at an unfashionable angle, but not without reason: I calculated the gradient of the average climb I do in Finale, then set the bike up on some wooden blocks at the same slope, then sit on the bike and adjust it to a comfortable flat position. It doesn't matter what it looks like, or what it is like going downhill as you should not be sitting down. If you are comfortable for 90% of the climbing time that is all that matters.
Wheels

The rear wheel is the original carbon prototype I got from Newmen last September. I have tried my best to break it, it's made some horrific noises and has some battle scars. It's still standing strong, despite me tempting fate by saying how unbreakable it is multiple times [Edit: I did manage to break this during a full-on DH race, see below].
I would use the matching front wheel if I had a 20mm version to fit the Dorado axle. Instead, I use a 32h E.G.30. This rim is the eMTB/gravity version and is about 50g heavier than the normal alloy A.30.
Why hybrid/mullet wheels? There are two major reasons why I like to run hybrid wheels. The main one is that when leaning into a corner the rear wheel tries to take a shorter arc than the front. When you lean and place the front wheel correctly into a corner, the rear tries to turn more and loses traction slightly, making the bike oversteer. This is particularly useful when riding blind, or on trails like we have in Finale that have hundreds of corners in one run that would take a lifetime to remember. I can just place the front wheel, lean and commit, and trust the bike will follow.


The second is lateral wheel stiffness. I don’t know what the percentage is, but the amount of load a rider puts through the rear wheel compared to the front is huge. I want a bigger diameter and more compliant front wheel, and a smaller stiffer rear wheel. I’m hoping that if I’m trying to track across some rough terrain I have roughly 30% on the front and 70% of my weight on the rear wheel, with both tracking equally.
Front Tyre
Magic Mary 29” x 2.4”, Addix Soft compound, 26psi
My go-to front tyre is the Eddy Current 29" x 2.4" but Michael from Schwalbe keeps asking me to not use the eMTB tyre on my normal bike as it's not the right product category! I hope he lets me off because I love this tyre. The long rectangular blocks offer a huge amount of traction when leant over (plenty of surface area pushing laterally) and are the most predictable tyre I have ever used. Sometimes I cut the leading edge to roll a bit faster, and have cut the central sipes to the back edge of the blocks so they flare open under braking for more traction, but this cutting can get pretty tedious. Luckily for Michael, we shot these photos while I was in the Alps and was using a Magic Mary for better braking traction on the steep stuff and grip in a wider range of conditions.
Rear Tyre
Schwalbe Eddy Current Rear 27.5 x 2.6”, Addix Soft compound, 26psi

I've been running a Rock Razor on the back for most of the year for fast-rolling, and because the lack of braking traction makes me focus more on gentle and smooth braking. With such a long and balanced bike, and the super slack head angle it is easier for me to do nearly all my slowing down with the front brake. The Rock Razor can be a little vague as you lean over but haven't made it to the edge blocks yet, but this has improved my riding as I try to either be riding straight or leaned over enough to get the edge digging in. Because of the vagueness, when I hit the edge it is noticeable and it digs in really well.
Again being in some steeper terrain I fancied trying the Eddy Current rear in 2.6", mostly to wind Michael up a bit more. Turns out it's actually a great rear tyre for dry bike parks: the huge square blocks mean a lot of surface area on hardpack and they barely seem to wear at all after days and days of use.
I do prefer tyres in the Addix Ultra Soft compound, as they deflect less in wet conditions off slippery edges and have better damping qualities, though the Addix Soft is fine 98% of the time in the dry conditions of Finale, and roll fast.
Inserts

I've only recently added Cushcore inserts to these wheels: firstly, because I didn't have any, but also because I got bored of using inserts as many of them are junk, don't really do anything, absorb tubeless sealant, block the valve holes and cause many other problems if you are constantly changing bikes and parts. I've been a fan of CushCore for years though, and am stoked to get them back on the bike now the products I am using are more consistent. I believe they are the best insert because they fit very tightly so actually lock the tyre beads down and support the sidewalls for better cornering support. They are also the only tyre insert company to provide some data about how the products work to absorb bumps and vibrations, and their new 'Bead Dropper' tool makes installation incredibly easy.
If you aren't using CushCore, you should be: better cornering, increased rim protection and vibration absorption.
Other
OChain
I like this OChain system, it really does work. I would not want it for XC racing, but I have done everything else on it, including messing around with trials manoeuvres and never really had a problem with the extra engagement. I think if you are worried about how fast the rear hub is engaging for general mountain biking you are not focussed on what the bike is doing 99% of the time: initiating a pedal stroke from nothing is a rare occurrence on the trail, I always remember Scott Sharples saying that the average WC DH run had 8x 5-second sprints over a 3-4 minute track. So that means you start to pedal 8x times in four minutes and each engagement takes a couple of milliseconds, then for the entire rest of the run you are hitting bumps and sensitive suspension is key.
This bike has about 25º of pedal kickback which is a bit more than desirable due to my wedging the longer shock into it. Sag is around 60mm, and the main third portion of the travel where most of the time is spent up to 140mm, the PK in this zone is exactly 12º - the same as the OChain relieves. So for the majority of the riding time, there is no PK and the bike feels like a magic carpet and is especially beneficial if you ride flat pedals.
Chain Ring

I had one of these rings for some time, and it feels insanely bizarre to start with, somehow it feels like it needs to be rotated 90º to work. After a few hours of riding it becomes natural and it makes the bike pedal even better than with a normal chainring. You can stamp on this bike even with the shock open and it barely moves the suspension at all.
Cranks

I don’t think too much about cranks. I’ve beaten the hell out of a SRAM GX crankset for 2 years with no problems, except the relatively short BB life. The Hope EVO crank's main benefit is the removal of material on the ground-side of the pedal axle, which is the point most likely to hit the ground when pedalling.
I went for an 83mm DH crank to increase the Q-factor. I prefer wider cranks for stability, and the Q-Factor on my BMX, for example, is 177mm. The Q-factor of the 73mm crankset is 167, and the DH version is 176mm. The BMX feels so much more stable and I think a wider stance is better for standing pedalling too. Of course, the wider cranks move the chainring outwards, so I spaced the BB over towards the non-driveside by 5mm and then use two 1mm pedal washers on the driveside crankarm to balance things out - it's not 5mm but I'm scared of ripping the threads out and I don't think my knees will notice 3mm difference.
The only data I have seen about Q-factors and the reason they are what they are based around efficiency on a road bike. I would like to see some Q-factor data for MTB riding which involves standing up and balancing much more than a road bike, and if rider height affects it? Anyone who has ridden a trials moto will recognise the feeling of the wide pegs and the way you can easily balance the bike by resting your weight on to one peg or the other.

Pedals
I've been riding the Catalyst since I had a pre-production prototype around 6 years ago. The EVO is the latest version which has even more durable bearings, is slightly lighter, and uses rear-entry pins instead of grub screws. There are some claims that they increase power output with thanks to a more 'mid-foot' pedalling position and proving or discussing this is a guaranteed plunge into an extra-deep rabbit hole, but the thing I can confirm is that they offer increased balance: the longer platform means that shoes twist less than a shorter platform. The most important thing with these pedals is the correct shoe: a flat shoe with a pre-curved sole will struggle with grip as it will float in the centre of the pedal and the pre-curve lifts the sole away from the pins, the best shoes I have found are the Five Ten FreeRider Pro which are very flat.

Do you need concavity? Sort of, but the effective concavity (measured from the tallest pins down the lowest points of the pedal) is 5mm so pretty similar to most pedals on the market. And yes they are heavy. Of course they are heavy because they are bigger than any other pedal on the market! These few grams are not noticeable when riding, though, and if I try to ride 'normal' pedals now I really struggle to balance.
Transparency
- Nicolai Bicycles pay me as a brand ambassador
- GeoMetron/Mojo pay me as a brand ambassador and free product servicing
- Newmen Components pay me to test, feedback and promote their wheelsets
- SQ Lab pay me to test, feedback an promote their grips, handlebars and saddles
- Hope allow me a B2B account to purchase any parts I want at trade price
- Schwalbe send me tyres with no obligation to use or feedback on them
- BikeYoke send me seatposts with no obligation to use or feedback on them
- I’m a brand ambassador for Pedaling Innovations/Big Chaps Bikes
- All other parts I have purchased myself from local shops, direct from brands, or through Bikecomponents.de
The plans for the next project are already shaping up to be even better than this one! If any bike brands want to get involved in the ‘Ultimate Downhill Bike’ please get in touch.

9/14/2020 12:23pm


View replies to: Ultra-Long, 210mm Travel Enduro Machine - Is This the Ultimate MTB?
Comments